My grandma would effortlessly whip up pie crusts when I was a youngster but has since ceased baking almost altogether. When she does make a pie, it is usually with the pre-made frozen variety of crust that can be purchased at the supermarket that is inferior in every way and filling plopped out from a can. Since she never eats the pies she makes, it makes no difference to her, and since no one ever complains to a grandma that brings baked goods, she’s basically oblivious to any change in quality.
It is almost certain to me that if you’re used to baking store-bought crusts that yours will improve in quality by making them from scratch. You’ll even save a couple of bucks while you’re at it. Furthermore, though it is possible to buy chilled pie dough, most often you’ll find that the dough has already been set and pre-baked into tart shells or pie plates and ready to be filled, which leaves you no room to improvise. What if you’d like fluted edges? How about a lattice top? What if you just want to put a lid on your chicken pot pie? You can’t choose whether you want your dough to be sweet or savory. There really aren’t a lot of options available to you, unless you make your own.
In trying to mimic grandma with her “a bit of this, a bit of that, and then you have pie crust!” method, making a pastry crust used to pose a great challenge for me. To make matters worse, ‘helpful’ books and websites only whittled at my confidence. I’ve since learned that my fear of overworking the dough was a tad embellished, that the concern of adding too much or too little liquid or fat was easily remedied by a decent recipe, watchful eye, and steady hand, that making pie crust really isn’t that difficult.
One important rule that I have learned, however, is to never try to halve a dough recipe. Pie crusts are often given in recipes suitable for making two crusts (for two pies or a top and bottom crust for one), but I’ve never had any success trying to make just enough crust for a single bottom. Why this so remains unclear to me, but as long as I stick to the basic principles (as outlined below) and a recipe for two, I no longer have any problems. Since pie crust can be made and refrigerated easily for up to a week, or frozen for several months, having extra dough is hardly an issue. In fact, it’s often a blessing in disguise, as it can easily be rolled out and filled for a quick quiche or dessert.
Here are some basic rules you always want to follow when making “pâte brisée”, that are published frequently with virtually every pie crust recipe to terrify you into picking up a pre-baked shell. Resist that temptation and give it a shot. Ideally, butter yields a most flavorful crust and is best for sweet preparations, and shortening or lard yields a flakier one. As long as you stick to the quantity of fat, you can substitute as you desire. The recipe that follows contains a combination of the two, to yield a flaky, flavorful crust that captures the best of both worlds.
TIPS FOR MAKING PIE CRUST
The ingredients, and preferably your hands, utensils, and bowls you are using should be as cold as possible. You want to maintain solid chunks of fat in your dough, not to melt them, and completely combine into the flour. This will make a flakier crust. If things are warm, the fat is going to melt, which will result in a tough crust. Contrary to this, however, as long as your butter hasn’t been sitting in the cupboard or been melted in the microwave, just out of the fridge butter and your body temperature hands as your only tools can still yield a decent dough.
You shouldn’t over mix the dough. Over mixing will also yield a dense, tough crust instead of a light, flaky one. The mixing causes gluten to develop and the fat to warm and melt, which we’ve already established to be bad. In contrast, you still need to mix the dough enough to actually get it to come together, so if you’re still going a minute strong and need some more water, it’s better to add some more water and mix longer than throw the crumbs into the fridge and cross your fingers.
Once you have made the dough, it is essential that you refrigerate it and allow it to rest. Since it is important to keep the fat solid and cold before baking, the refrigerating will help that, and allowing the dough to rest will help shorten and relax the gluten strands, which will make rolling it easier and the finished product ultimately flakier. Pastry flour is often recommended for pie crusts because it has a lower protein content, and therefore lower gluten production, but all-purpose flour can work reasonably well too.
Here is a basic recipe for pie crust:
Basic Pâte Brisée
Click here to get printable version
Ingredients:
- 2 1/2 cups pastry or all-purpose flour
- 1 teaspoon salt
- 3/4 cup cold butter
- 1/2 cup shortening or lard
- sufficient quantity of ice water
Directions:
Sift together flour and salt into a bowl.
Cut butter and lard into small cubes, then cut into the flour mixture with your fingers, a fork, or a pastry cutter until most chunks are combined.
Gradually add small increments of ice water into the contents, handling as little as possible, until they just barely hold together as a dough.
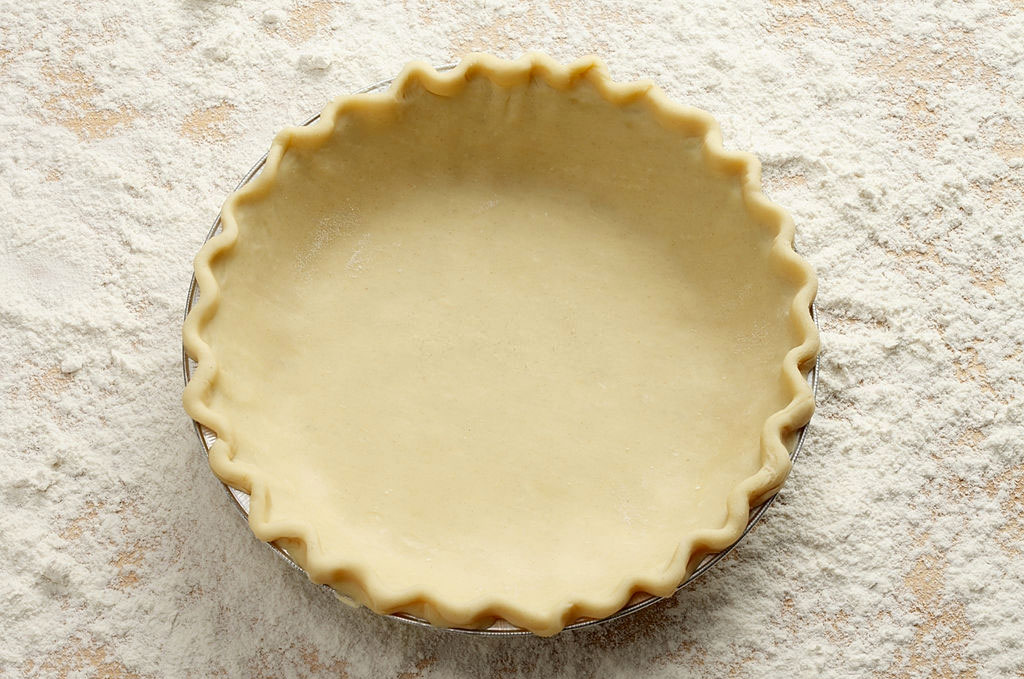
Wrap the dough loosely with plastic wrap, press into a disk shape, and refrigerate.
Now here is a classic recipe to take advantage of your newly established pastry-making abilities.
1 recipe pie crust
Ingredients:
- 2 granny smith or other tart apples, cored, peeled and sliced 1/4-1/8″ thick
- 2 fuji, gala or other firm apples, cored, peeled and sliced 1/4-1/8″ thick
- 6 tablespoons unsalted butter
- 1/4 cup cinnamon sugar (1/4 cup sugar with 1 teaspoon cinnamon, mixed)
- pinch of salt
- 1 egg
- 2 tablespoons milk
- sugar, to dust
Directions:
Prepare the filling by heating a large skillet over medium-high heat and melting half of the butter.
Allow the butter to brown (not burn) then add half of the apples. Stir the apples to coat with the butter, then continue to stir occasionally until they begin to caramelize and soften.
Add half of the cinnamon sugar and sprinkle with a pinch of salt. Stir to coat and transfer the cooked apples to a parchment-lined baking sheet or similar to cool.
Repeat with the remaining portion of butter, apples, cinnamon sugar, and salt and allow all of the apple mixture to cool to room temperature.
Preheat your oven to 350 degrees.
Unwrap the dough and place it on a lightly floured surface, lightly dust with flour and roll out about 1/16″ thick, to a 14-16″ shape as closely resembling a circle as possible.
If you desire a more rustic looking tart, skip this step. Otherwise use a large pizza pan or similar to trace a perfect circle out of the dough.
Dust off remaining flour and transfer the dough to a baking sheet lined with parchment paper.
Mound the apple filling in the center of the crust, allowing an inch to several inches of space on the border to fold inward.
Pick an edge of the circle and fold a portion of the crust on to the filling.
Continue moving around the crust, folding in portions of the crust as you go.
When you come to the end, you may need to unfold your first fold in order to make the end and first fold match. I realize this might sound and look complicated, but once you’re actually doing so, it will become apparent that it is actually quite simple.
Whisk together the egg and milk. With a pastry brush, lightly coat the visible portion of the crust with the egg and milk wash.
Dust the egg-washed crust lightly with sugar and bake in the oven until the crust is browned about 20-25 minutes.
Transfer to a cooling rack and allow to cool for several minutes before slicing and serving.