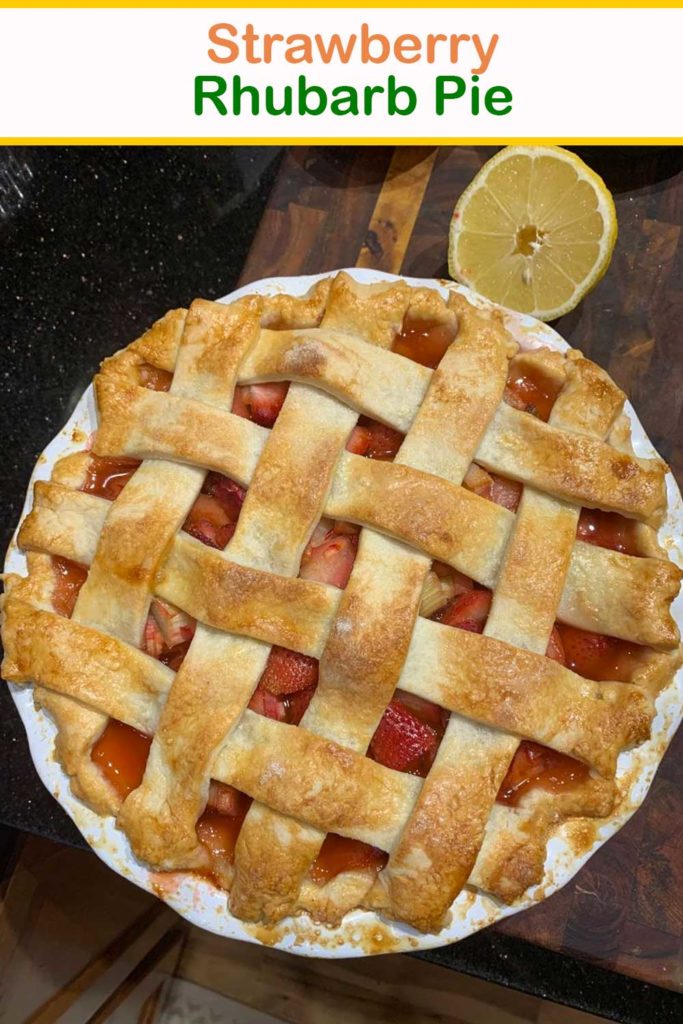
I made this pie a couple weeks ago and there are actually quite a few different stories that go along with it. Firstly, my older brothers’ favorite pie is strawberry-rhubarb. He’s just always loved it since we were kids. He kind of has a thing for lemon desserts too, so it’s probably safe to say that he is a sweet & sour fan. That’s one thing we don’t have in common. Personally, it’s not my favorite combination, but I’d be hard-pressed to say no to anything sweet at all, soooo…. yeah- I had no problem whipping up a strawberry rhubarb pie. Especially! Since it was in honor of that same brother leaving for deployment to Afghanistan. Can I just tell you- my Husband and both of my brothers (all of my siblings) are in Afghanistan right now. Funny how things work out. But anyways! That was the purpose of this pie. It was a strawberry-rhubarb-deployment-pie.
Here is the second story that goes along with this pie- After I shared it with just 3 people, luckily two of those included myself and my brother, my Father was carrying the pie over to his house to share with others. Well, no sooner did he walk out the kitchen door that there was a SMASH followed by a list of profanities… My heart instantly sank and my rage skyrocketed. Not only was 2/3 of a fresh, delicious pie smashed, but so was my new vintage pie plate I had just found on Ebay : ( Not to mention the money, and time, etc, etc, etc. I digress though. My point is this poor pie lasted just long enough to take a photo and share a couple menial slices. And as angry as I was at the moment, I can kind of look back and laugh now… especially since a few weeks later my Father also dropped my cheesecake. He is no longer allowed to carry food.
Now on to the PIE! This pie was good. I was incredibly pleased with the outcome. I always worry about excessive juices in pies and the texture. I’ve had problems in the past with the rhubarb being to firm. We really like our pie fruit to be well-cooked in my family, so I made sure to cut the rhubarb especially small. The original recipe called for 1″ chunks- I think that is WAY too big! I dialed it down to 1/2″ in the written recipe but probably cut it down to 1/4″ in my actual pie. That’s just personal preference though. The original recipe also called for orange zest but I opted out of that entirely. I just think that would make for too much excess citrus going on. Just a touch of lemon is all you really need to brighten the flavor.
In the end I used my favorite pie crust recipe (Vodka Pie Crust!!) and had complete success with entire pie as a whole. A perfectly flaky crust, with out the bottom being too soggy or the juices being too runny. I think tapioca might be my new favorite pie thickener. Just be aware that you should either buy the tapioca that is made for pie fillings or take the regular tapioca pearls, measure them out and then grind them into a powder. Otherwise you will have little beads in your pie filling. Then again, don’t grind down all your tapioca then measure out 3 to 4… like I did with my cherry pie. It didn’t turn out so well. You probably get four times the thickening power that you’re looking for.
And my very last pointer- do NOT forget to string your rhubarb!!! I had no idea rhubarb needed to be stringed so in the past I’ve made pies with all the fibrous strings still on and been left with quite a crunchy filling. Not what you want in your pie. This blogger has a great tutorial on it and just so happens to be where I found the recipe as well. So skip on over there if you’re not sure what I am talking about.
Strawberry-Rhubarb Pie
Ingredients:
- One recipe double pie crust
Filling:
- 3 cups fresh strawberries, hulled and sliced
- 3 cups fresh rhubarb, skinned and cut into ½-inch pieces
- ¾ cup granulated sugar
- 1 tablespoon grated orange zest
- 2 teaspoons lemon juice
- ¼ teaspoon vanilla extract
- 3 – 4 tablespoons quick-cooking tapioca
- 2 tablespoons unsalted butter, cut into small pieces
Directions:
Heat oven to 400°F. Toss fruit with sugar, lemon juice, vanilla extract, and tapioca; let stand for 15 minutes.
Roll larger dough disk on lightly floured surface into 12-inch circle, about ⅛-inch thick. Transfer and fit dough into 9-inch Pyrex pie pan, leaving dough that overhangs the lip in place. Turn fruit mixture, including juices, into pie shell. Scatter butter pieces over fruit. Refrigerate until ready to top with remaining dough.
Roll smaller disk on a lightly floured surface into 10-inch circle. Lay over fruit. Trim top and bottom dough edges to ½-inch beyond pan lip. Tuck this rim of dough underneath itself so that folded edge is flush with pan lip. Flute dough in your own fashion, or press with fork tines to seal. Cut four slits at right angles on dough top to allow steam to escape. If pie dough is very soft, place in the freezer for 10 minutes before baking.
Place pie on baking sheet; bake until top crust is golden, 20 to 25 minutes. Reduce oven temperature to 350 degrees and continue to bake until juices bubble and crust is golden brown, 30 to 40 minutes longer.
Transfer pie to wire rack; let cool to almost room temperature so juices have time to thicken, from 1 to 2 hours.


