It’s time once again for a Slice of Cake (aka The Cake Slice monthly baker’s group)! This month’s cake is the Brooklyn Blackout Cake, which is a cake that was once made by now-defunct Ebinger’s Bakery, but which lives on in Brooklyn’s fondest memories. Apparently, lots of people have attempted to recreate the cake, with varying levels of success. This recipe comes from Tish Boyle’s The Cake Book and is her version of this three-layer devil’s food cake, filled with creamy chocolate pudding, and topped with chocolate frosting and cake crumbs.
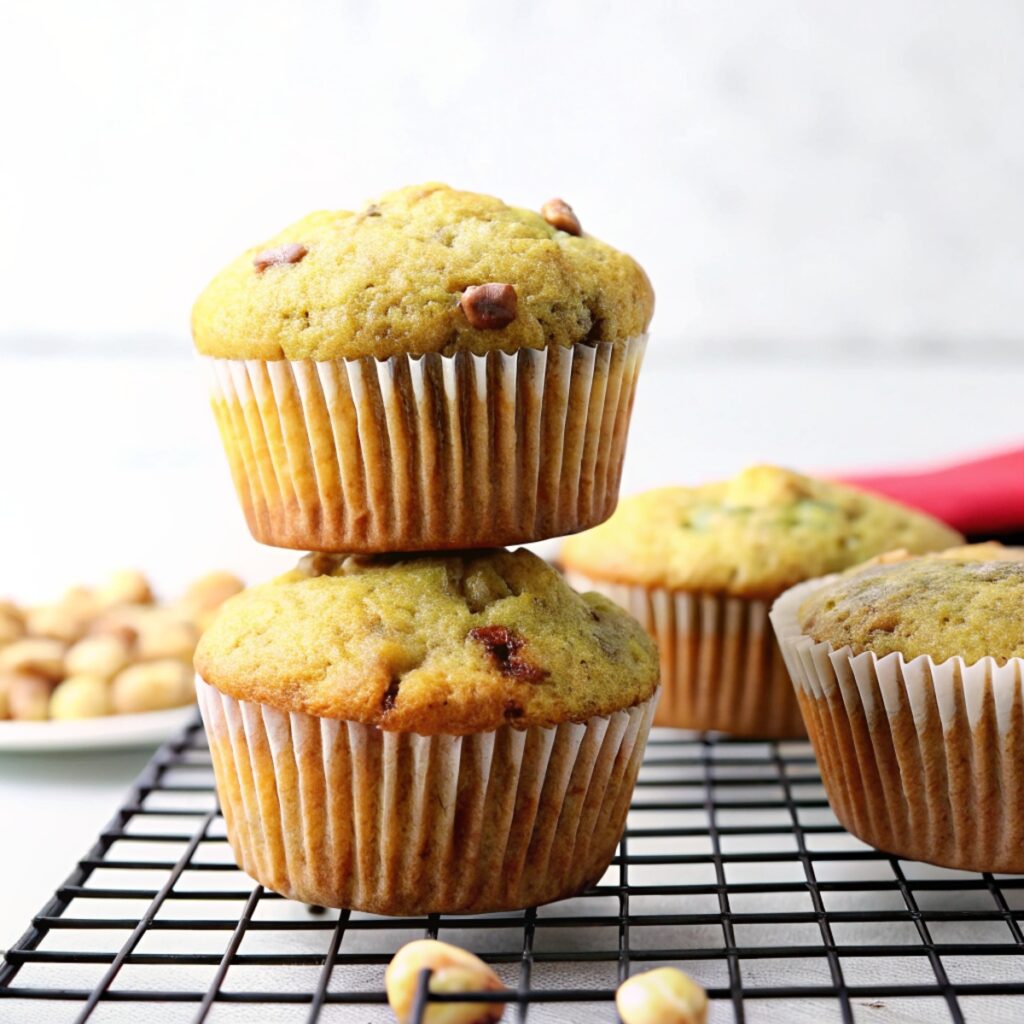
Since we’re still trying to get in shape here at the DFD house, I pondered how to make this big, gorgeous, tempting chocolate cake a little less dangerous. With all that chocolate in there, tweaking the flours and butters (as I did with the Cinnamon Swirl Cake) wouldn’t make that much of a dent. So instead I just decided to limit our exposure – I left the recipe alone, but only made 1/3 of it AND made that into small, individual cakelets, rather than one cake.
I used a mini-loaf pan to make these instead of a regular cake pan, but you could definitely do the same with a muffin pan, or a smaller cake pan. Because I did these as minis, I couldn’t really do the 3 layer action, but 2 layers worked just fine. My boyfriend has been scarfing them all week.
This was an easy cake to make and quite delicious. The cake (moist and chocolatey) and the pudding (creamy and chocolatey) are each wonderful in their own right and could definitely be used separately. I got my frosting a little too stiff and would add a touch of milk next time to smooth it out, but otherwise was also easy and yummy. This is another keeper (so far, everything from this book is) and someday, I will be doing the full blown 3 layer version of this cake, for sure.
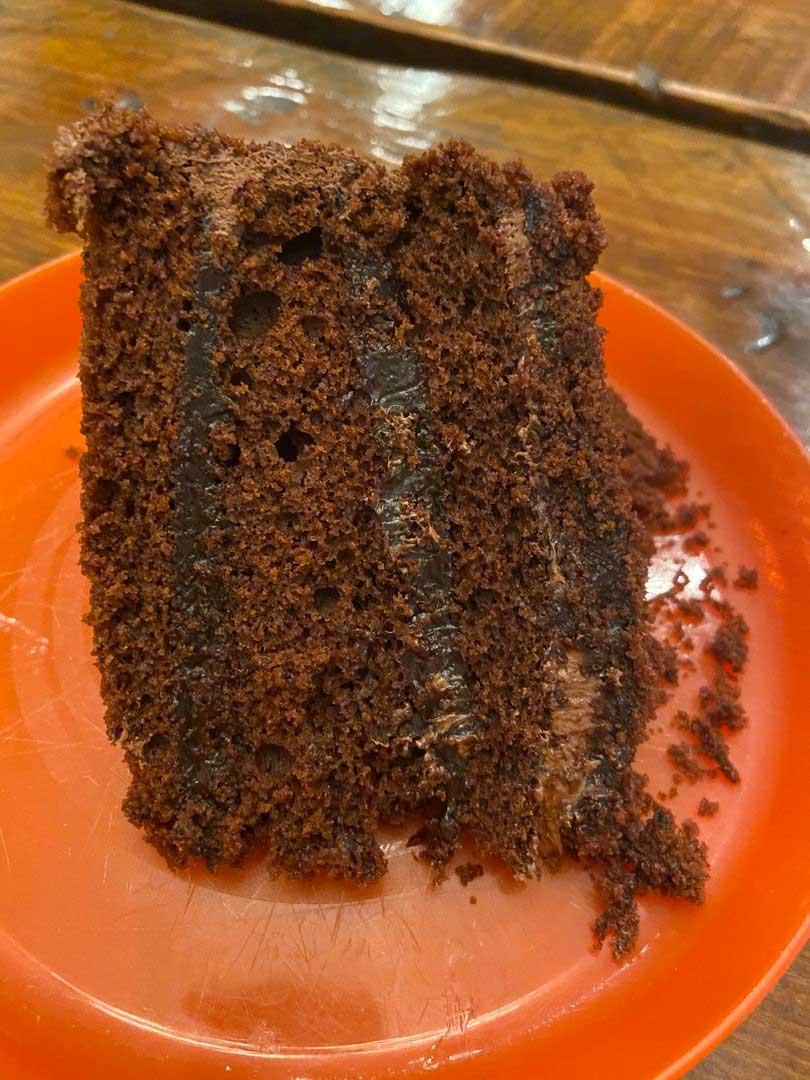
As you can see, my biggest problem was that we were in such a rush to eat them, that I barely took time to slap them on a plate to get a picture.
Brooklyn Blackout Cakelets
Click here to get printable version
Ingredients:
CAKE:
- 1/2 cup all purpose flour
- 1/3 cup natural cocoa powder
- 1/2 teaspoon baking powder
- 1/2 teaspoon baking soda
- 1/3 teaspoon kosher salt
- 2/3 cups sugar
- 1 large egg
- 1/2 large egg yolk
- 1/3 cup buttermilk
- 1.3 oz unsalted butter, melted
- 1 teaspoon vanilla extract
- 1/3 cup hot coffee
FILLING:
- 1 large egg yolks
- 1 1/2 oz sugar
- 2 tsp cornstarch
- 1 pinch kosher salt
- 1/3 cup water
- 3 Tbsp + 2 tsp heavy cream
- 1 ounces semisweet chocolate, finely chopped (I used chips)
- 1/3 teaspoon vanilla extract
FROSTING:
- 1.3 oz unsweetened chocolate, coarsely chopped
- 1.84 oz unsalted butter, softened
- 2.5 oz powdered sugar
- milk, as needed, to thin the frosting (optional)
Directions:
MAKE THE CAKE
Position a rack in the center of the oven and preheat to 350°F. Grease and flour the bottom and sides of two round cake pans or, mini-loaf pans or muffin pans.
Sift the flour, cocoa powder, baking powder, baking soda, and salt into the bowl of your mixer. Add the sugar and, mix at low speed with the paddle until blended.
In another bowl, whisk together eggs, egg yolk, buttermilk, melted butter, and vanilla extract. With your mixer on low, add the egg mixture to the dry ingredients in a steady steam. Scrape down the sides of the bowl with a rubber spatula, then beat at medium speed until well blended, about 1 minute. Add the hot coffee, mixing just until blended. Remove the bowl from the stand and stir the batter up from the bottom of the bowl a few times to thoroughly blend it. Scrape the batter into the prepared pans, dividing it evenly and smoothing the tops.
Bake the cakes for 30 to 35 minutes (15-20 mins for minis), until a cake tester inserted into the center comes out clean. Check early – overbaking makes dry cakes. Cool the cakes in the pans on wire racks for 10 minutes.
Invert the cakes onto the racks and cool completely.
MAKE THE FILLING
Beat the egg yolks, sugar, cornstarch, and salt with a stand or handheld mixer at medium speed until pale, about 1 minute.
In a medium saucepan, bring the water and cream to a boil over medium heat. Remove from the heat and temper the egg mixture by whisking in about half of the hot cream mixture. Whisk this mixture back into the remaining cream mixture in the saucepan. Cook over medium heat, whisking constantly, until the mixture comes to a boil. Continue to boil, whisking, for 1 minute. Remove the pan from the heat and whisk in the chocolate until completely melted.
Press the filling through a fine-mesh sieve into a small bowl. Stir in the vanilla extract. Cover the surface of the pudding with plastic wrap (or parchment paper) and refrigerate for at least 2 hours, until chilled.
MAKE THE FROSTING
Melt the chocolate carefully in the microwave or over a double boiler. Be careful not to overheat – burned chocolate is ruined and cannot be saved. Set aside to cool until tepid, but still liquid.
Beat the butter at medium speed with your stand or handheld mixer until creamy, about 1 minute. Add the powdered sugar and beat at medium-high speed for 2 minutes, scraping down the sides of the bowl as necessary. Beat in the vanilla extract and melted chocolate, then beat until well-blended and creamy, about 1 minute.
ASSEMBLE THE CAKE
Using a long serrated knife, cut each cake layer in half horizontally, to make 4 layers. Reserve one layer for the crumb topping.
If doing minis, cut each mini cake in half. Trim edges and tops for uniformity and use these for the crumb topping layer..
Place a cake layer, cut side up, on a serving plate. Whisk the chilled pudding until smooth. Using a small offset metal spatula, spread half of the filling over the layer. Top with another cake layer and spread it with the remaining filling. Top with a third cake layer, smooth side up. (If doing minis, divide pudding evenly among however many you have. Mine made 6.)
Break half of the reserved cake layer into large pieces and place them in the bowl of a food processor (save the remainder of the cake layer for snacking). Process the cake to fine crumbs, and set aside. Or, use excess crumbs from minis in the same way.
Using a narrow metal spatula, frost the top and sides of the cake with the frosting. Pat a generous amount of cake crumbs onto the sides of the cake, pressing them lightly into the frosting. Sprinkle the remaining cake crumbs over the top of the cake. Serve at room temperature or slightly chilled.